Long exposure photography transforms static scenes into dynamic images – waterfalls become silky ribbons, clouds streak across skies, and cityscapes shimmer with light trails. At night, long exposure is the only way to capture starscapes, Milky Way core details, and light-painted landscapes. This guide covers the complete gear setup for long exposure photography in 2026, from the right camera settings to the filters and tripods that make it possible.
What is Long Exposure Photography?
Long exposure photography uses shutter speeds ranging from one second to several minutes (or longer) to capture motion, accumulate light in darkness, or create deliberate creative blur effects. In nature photography specifically, the technique is used for:
- Silky waterfall and river effects (1/4s – 4s)
- Streaking cloud motion in seascapes (30s – 4 minutes)
- Star trail photography (15 minutes – several hours)
- Milky Way core capture (15–25 seconds)
- Light painting in dark landscapes (20s – 2 minutes)
Essential Long Exposure Gear
Tripod: The Non-Negotiable Foundation
Any movement during a long exposure ruins the image. Your tripod needs to be absolutely stable on uneven terrain:
- Gitzo Systematic GT2543LS – Professional standard; no center column means maximum stability
- Benro Mach3 Carbon Fiber Tripod – Excellent vibration damping at a more accessible price
Always hang your camera bag from the tripod’s center column hook to add ballast on windy days. Switch off image stabilization when the camera is tripod-mounted – IBIS can hunt and introduce blur during long exposures on some camera models.
Remote Shutter Release / Intervalometer
Pressing the shutter button physically transmits vibration into the camera. For any exposure over 1 second, use a remote release or the camera’s 2-second self-timer. For star trails and multi-frame time lapse, an intervalometer automates sequential captures:
- JJC Wired Intervalometer Shutter Remote – Reliable, model-specific wired release with Bulb timer
- Vello FreeWave Wireless Remote – Wireless option for situations where cable management is difficult
ND Filters: Extending Exposures in Daylight
Achieving long exposures in daylight requires blocking light without affecting color. ND filters are essential:
- 6-stop ND (ND64): Converts a 1/60s exposure to about 1 second in typical daylight; ideal for waterfall photography
- 10-stop ND (ND1000 / Big Stopper): Converts a 1/250s to nearly 4 seconds; enables dramatic cloud and water motion blur in bright conditions
- Lee Filters Big Stopper 10-stop ND – The professional standard; minimal color cast
- Breakthrough Photography X4 6-stop ND – Excellent color neutrality in screw-in format
Camera: Mirror-Up / Electronic Shutter
Camera vibration from the mechanical shutter itself can affect very long exposures at certain shutter speeds (typically 1/2s – 1/8s where resonance is worst). Use electronic shutter or electronic front curtain shutter (EFCS) to eliminate this. Most modern mirrorless cameras default to EFCS and have no mirror to worry about.
Best long exposure cameras for 2026:
- Sony A7 IV – Excellent dynamic range for recovering detail across extreme contrast in long exposure seascapes
- Nikon Z8 – Best dynamic range for landscape long exposures; deep shadow recovery essential for nightscapes
- Sony A7S III – For night long exposures where maximum sensitivity is needed (astrophotography, moonlit scenes)
Long Exposure Techniques
Calculating Exposure With ND Filters
Using a 10-stop ND filter, multiply your unfiltered shutter speed by 1024 (2^10). A metered exposure of 1/100s becomes approximately 10 seconds with a 10-stop ND. Most smartphones have free ND filter exposure calculator apps – search “ND filter calculator” for options.
Focusing With Strong ND Filters
Strong ND filters block too much light for autofocus to operate. Always focus before attaching the ND filter – set the focus point, switch to manual focus to lock it, then attach the filter and expose.
Star Trails vs Milky Way
For star trails, shoot multiple 30-second exposures over 30–120 minutes and stack them in StarStax (free software) rather than one very long single exposure – this manages sensor heat, noise, and saturation better. For the Milky Way core without trails, keep exposures under 25 seconds (500 Rule: 500 ÷ focal length = max seconds before trailing).
Frequently Asked Questions
Long Exposure Settings: Quick Reference by Subject
Knowing the right starting settings for each subject saves significant trial-and-error in the field. Adjust from these baselines based on available light, but they’ll get you into the right ballpark immediately.
| Subject | Shutter Speed | ISO | Aperture | ND Filter |
|---|---|---|---|---|
| Silky waterfall (overcast) | 1–4 seconds | 100 | f/8–f/11 | 6-stop (ND64) |
| Very misty waterfall | 15–30 seconds | 100 | f/8 | 10-stop (ND1000) |
| Seascape wave trails | 2–8 seconds | 100 | f/8–f/11 | 6-stop |
| Cloud motion in sky | 1–4 minutes | 100 | f/8 | 10-stop |
| Milky Way core | 15–25 seconds | 1600–6400 | f/1.4–f/2.8 | None |
| Star trails (stacking) | 30 sec × 60–120 shots | 800–1600 | f/2.8–f/4 | None |
| Light painting | 20–60 seconds | 100–400 | f/8 | None |
Always shoot RAW when doing long exposure work. The white balance and exposure latitude you gain in RAW processing far outweighs any convenience from JPEG, especially for ND-filtered daytime shots where color casts need correction and for night sky images where you’ll push shadows significantly in post.
Best Natural Subjects for Long Exposure Photography
Certain subjects in the natural world are particularly well-suited to long exposure treatment. Understanding what makes each one work helps you pre-visualize results before you even set up your tripod.
Waterfalls and Rivers
Moving water is the most accessible long exposure subject. The key is matching your exposure time to the speed of the water and the effect you want. Fast, turbulent waterfalls often look best at 1–2 seconds, which smooths the water while still showing the direction and volume of flow. Slower, broader rivers can tolerate 4–8 seconds before becoming completely featureless. Overcast days are ideal – the soft, even light eliminates harsh shadows in the gorge and gives you longer natural exposures without needing very strong ND filters. Early morning before direct sun reaches the water is another excellent window.
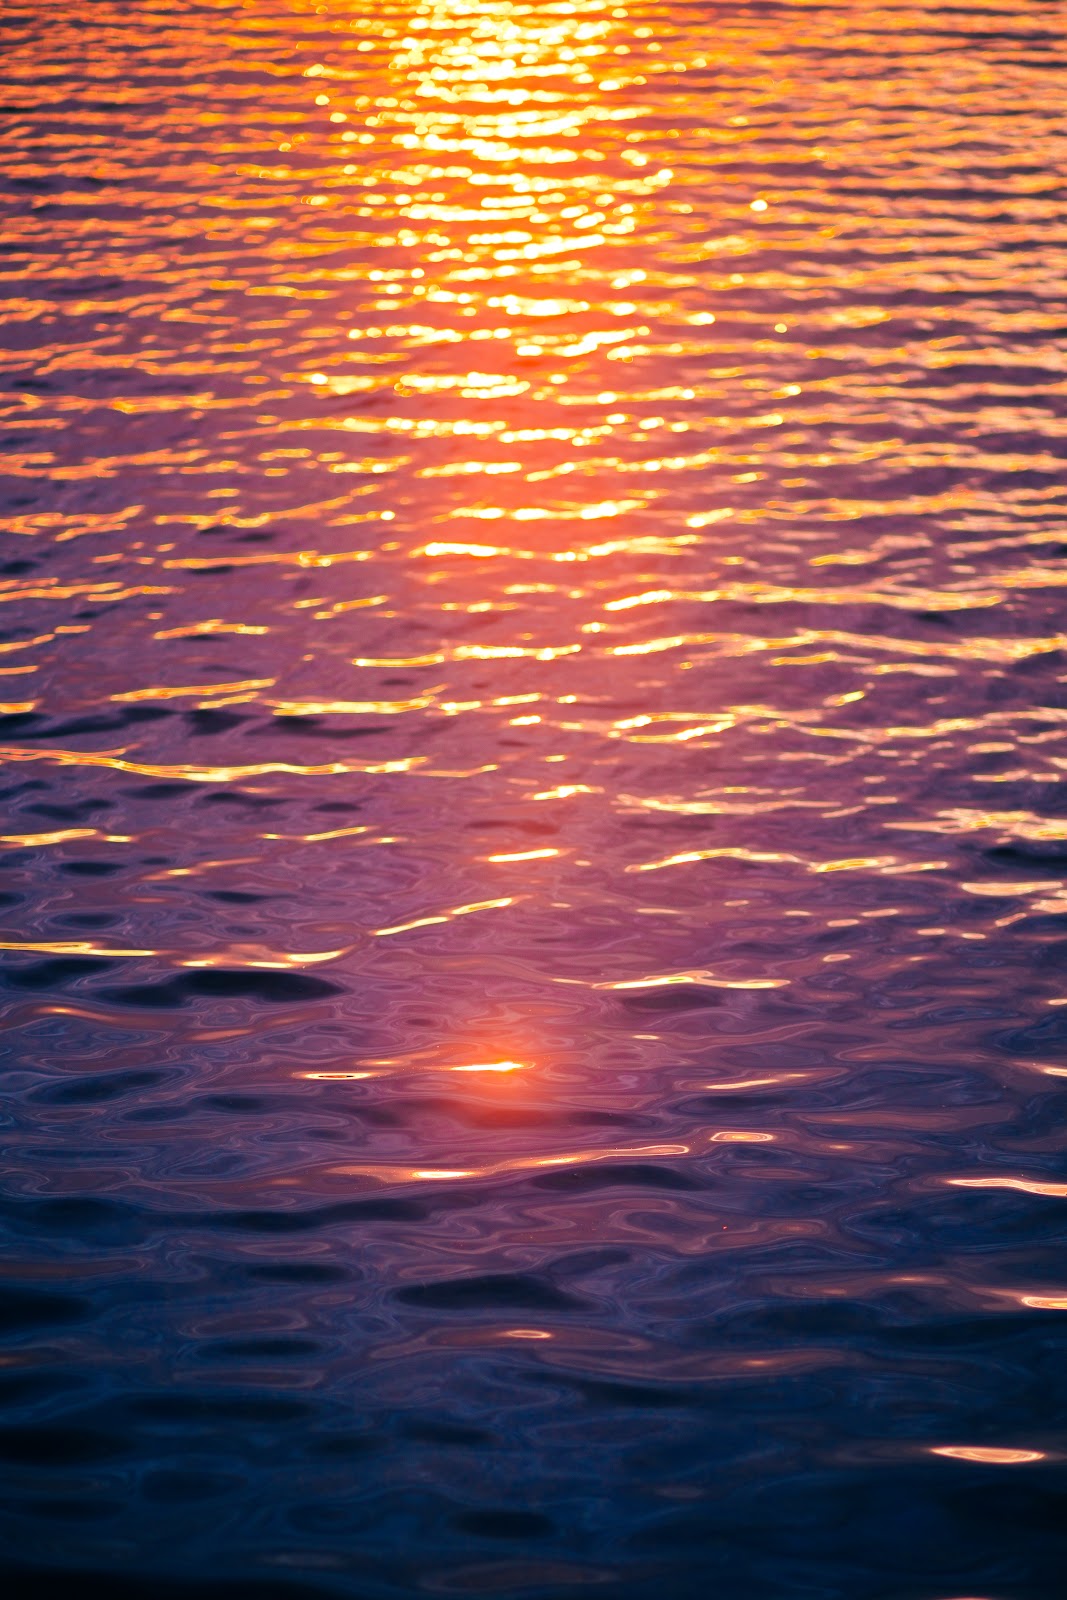
Seascapes and Coastal Scenes
Ocean waves offer constantly changing compositions with each exposure. Rocks emerging from a bed of silky mist, piers disappearing into smooth water, and lighthouses standing against streaked cloud skies are all long-exposure classics. Blue hour – the 20–30 minutes just before sunrise or just after sunset – is the ideal window. Light is low enough for 30-second to 2-minute exposures without very strong filters, colors are rich and even, and the sky retains detail that would be lost in total darkness. Shoot in portrait (vertical) orientation to capture foreground rocks and a dramatic sky simultaneously.
Night Sky and Astroscapes
Long exposure is the only way to photograph the night sky meaningfully. For Milky Way photography, target new moon periods (minimal moonlight) and find locations at least 60–100 miles from significant light pollution. Use a light pollution map (lightpollutionmap.info) to find Class 3 or better Bortle scale locations. For star trails, more light pollution is tolerable since you’re capturing the trails rather than fine nebula detail, but you’ll need to manage sky glow with careful white balance correction in post.
Post-Processing Long Exposure Images
Long exposure raw files have specific processing needs that differ from standard landscape shots.
White Balance and Color Cast Correction
Even quality ND filters can introduce a slight color cast – usually a slight cool or warm shift. In Lightroom, start by adjusting white balance manually rather than using presets. Use the eyedropper on a neutral gray element (wet rock, concrete) if one exists in the frame. For seascape images shot during blue hour, a slight warming of the white balance (4500–5200K) often looks most natural against the cool water tones. For night sky images, cooler white balance (3800–4200K) preserves the blue-black sky appearance while keeping star colors accurate.
Noise Reduction
Long exposures accumulate noise even at base ISO, especially in shadow areas and skies. Lightroom’s AI Denoise (available in Lightroom Classic 12.3+) does an excellent job on long-exposure files while preserving fine detail like water texture. Apply it selectively using masking – noise-reduce the sky and smooth water areas aggressively while leaving textured foreground elements like rocks and foliage with more natural rendering. For star trail composites processed in StarStax, run the final merged TIFF through noise reduction before final adjustments.
Blending Exposures
A powerful technique is blending a long exposure (for water/sky motion) with a shorter exposure of the same scene (for foreground detail that may have blurred at longer speeds). Shoot both from the same tripod position – the long exposure handles the moving elements, the shorter exposure handles static foreground detail. Blend in Photoshop using luminosity masking or a simple brush mask on the foreground layer.
Common Long Exposure Mistakes (And How to Avoid Them)
Even experienced photographers make these mistakes – knowing them in advance prevents frustration in the field.
Forgetting to switch to manual focus after attaching the ND filter: If autofocus hunts after you attach a 10-stop ND filter (which it will – the scene is too dark for AF), your entire sequence will be out of focus. Establish focus before attaching the filter, then lock manual focus.
Using the center column at full extension: A center column extended above the tripod legs acts as a lever arm, amplifying any vibration. Keep the center column retracted or minimally extended. If you need more height, use longer tripod legs instead.
Not checking the battery level before a long session: A 2-hour star trail sequence stopped after 45 minutes because the battery died is a common and easily preventable disaster. Check battery level before each session and carry at least one fully charged spare.
Ignoring condensation on ND filters: In humid conditions or near spray from waterfalls, ND filters fog up – usually mid-session. Bring a microfiber cloth and check your filter surface periodically. A lens hood helps reduce spray reaching the filter in waterfall environments.
Not previewing the composition without the filter first: A 10-stop ND filter renders the viewfinder nearly black. Always compose, focus, and refine your shot completely before attaching the filter. Once the filter is on, making composition adjustments means removing it and starting over.
What ND filter do I need for long exposure waterfall photography?
A 6-stop ND filter (ND64) handles most overcast daytime waterfall scenarios, producing silky 1–4 second exposures. A 10-stop ND is useful for extending exposures to 15–30 seconds in brighter conditions or for creating an extremely misty effect on fast-moving waterfalls.
Should I turn off image stabilization for long exposure on a tripod?
Generally yes – some lens and in-body stabilization systems can hunt or introduce micro-movement during very long tripod-mounted exposures. Most modern mirrorless cameras and lenses have tripod-detection modes that disable stabilization automatically when tripod movement is detected, but check your specific camera and lens manual for recommendations.
What aperture is best for long exposure landscape photography?
f/8–f/11 is the optimal aperture range for most long exposure landscape photography – sharp corner-to-corner without diffraction softening, with good depth of field for front-to-back sharpness. Avoid f/16 and narrower unless necessary, as diffraction noticeably affects image quality at those apertures on modern high-resolution sensors.
Can I do long exposure photography without ND filters?
Yes – at night, during blue hour, or in deeply shaded locations, you can achieve long exposures without any ND filter. Shaded waterfall gorges at midday often provide enough natural light reduction for 1–2 second exposures at base ISO and f/11. ND filters are only required when ambient light is bright enough to overexpose the scene at your desired exposure time. Dawn and dusk are excellent “natural ND” windows for seascape and landscape long exposure work.
How do I prevent camera shake on windy days?
Several techniques help in wind: hang your camera bag from the center column hook to lower the tripod’s center of gravity; use the widest leg spread your tripod allows; avoid extending the center column; shield the camera body and lens barrel with your body between gusts; and if conditions are severe, use a 2-second delay before triggering so any vibration from you touching the remote settles before the shutter opens. A heavier, lower tripod position is almost always more stable than a taller one.
What is the 500 Rule for Milky Way photography?
The 500 Rule estimates the maximum exposure time before stars begin trailing on a full-frame camera: divide 500 by the focal length in mm. A 24mm lens allows approximately 20 seconds (500÷24=20.8) before trailing becomes visible. On a crop-sensor camera (1.5x crop factor), use 340 instead of 500 (340÷24≈14 seconds). A more conservative “300 Rule” is often recommended for high-resolution sensors above 40 megapixels, where even small amounts of trailing are visible at native resolution.
Browse more nature photography tutorials, gear reviews, and field tips.
Download our guide: exposure, ISO, and aperture strategies for every light condition and terrain.
We respect your inbox. One guide, occasional tips, unsubscribe anytime.
Related Guides
 Best Polarizing Filters for Nature Photography (2026): 6 CPL Filters Compared
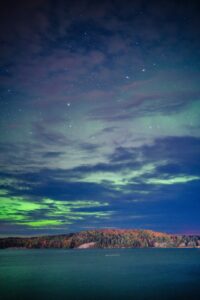 How to Photograph the Milky Way: Settings, Planning & Post-Processing
 Best Camera Backpacks for Hiking & Nature Photography (2026): 7 Tested Picks
 Mastering Long Exposure Photography: A Complete Guide to Silky Water & Dramatic Skies