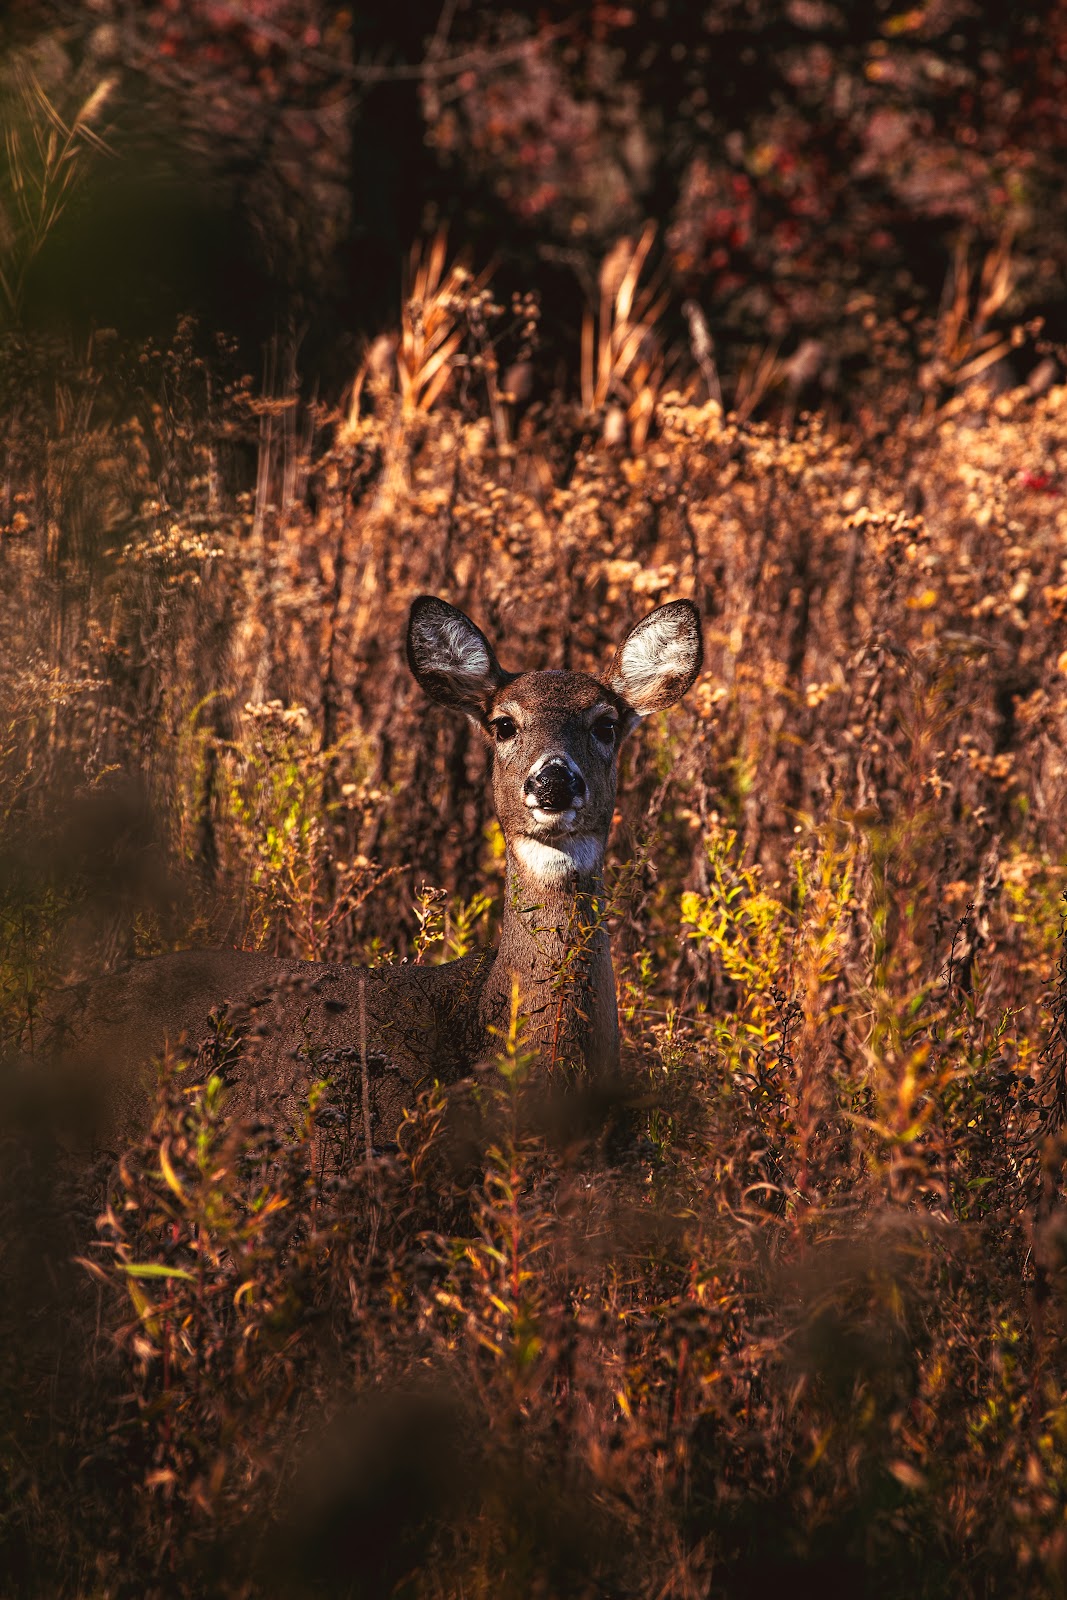
You are walking a forest trail at 7 a.m. when you round a bend and spot a white-tailed doe 40 yards away in a meadow, lit perfectly by the low morning sun. Your heart rate jumps. You raise your camera. She looks directly at you. You have maybe 10 seconds before she bolts. Here is how to make those seconds count, and how to set yourself up for better encounters next time.
The Two Keys to Photographing Deer: Distance and Stillness
Deer have excellent peripheral vision and a strong sense of smell. They are also highly attuned to sudden movement. The two things that trigger a deer to run are rapid movement and approaching from downwind. Everything in your field strategy should address those two factors.
The good news is that deer are habitual. They use the same feeding areas, travel corridors, and bedding spots regularly. If you find a good location once, you can come back at the same time and find deer there again.
Step-by-Step: Setting Up for Deer Photography
Step 1: Scout Your Location the Day Before
Look for feeding areas like open meadows adjacent to tree lines, field edges, or forest clearings. Early morning and late afternoon are when deer are most active. Note where the sun will be so you can position yourself with the light behind you or to your side.
Step 2: Approach From Downwind
Check the wind direction before you approach. A deer that smells you will bolt immediately with no warning. Approach from a direction where the wind is blowing from the deer toward you, or across from you, never from behind you toward the deer. This single factor matters more than any camera setting.
Step 3: Move Slowly and Use Cover
Move slowly. When the deer has its head up and is looking around, stop completely and stay still. When it drops its head to graze, take a few slow steps closer. Repeat this pattern. Stay low if possible and use trees, bushes, or tall grass to break up your silhouette. Wear earth tones or camo. Avoid bright colors or white clothing.
Step 4: Set Your Camera Before You Approach
Set everything before you get close so you are not fumbling with dials when the deer is in front of you. Use aperture priority or manual mode. Set your ISO to Auto with a maximum of 3200. Set your aperture to f/5.6 or f/6.3 for a balance of sharpness and background blur. Set minimum shutter speed to 1/500s in Auto ISO mode, or set it manually if shooting manual.
Step 5: Use Continuous Autofocus
Switch your camera to continuous autofocus: AI Servo on Canon, AF-C on Nikon and Sony. Set your AF area to a flexible single-zone or small zone that you can track the deer’s eye with. The eye should always be your focus point. Press the shutter halfway or use back-button autofocus to track the deer as it moves.
Step 6: Shoot in Bursts
When you have a good composition and the deer is in the light, fire in short bursts of 3 to 5 frames. This increases your odds of getting a sharp frame with the deer in a natural pose, ears up, or mid-movement. Do not hold the shutter down continuously or you will fill your buffer and miss the best moments.
Camera Settings Reference for Deer Photography
| Situation | ISO | Aperture | Shutter Speed | AF Mode |
|---|---|---|---|---|
| Early morning, low light, deer still | 800-1600 | f/5.6 | 1/500s | AF-C / AI Servo |
| Golden hour, good light, deer grazing | 400 | f/6.3 | 1/640s | AF-C / AI Servo |
| Midday bright sun, deer alert | 200 | f/7.1 | 1/800s | AF-C / AI Servo |
| Deer running or bounding | Auto (max 3200) | f/5.6 | 1/1000s or faster | AF-C, wide zone |
| Overcast, still deer, forest setting | 1600-3200 | f/5.6 | 1/500s | Single or AF-C |
Best Times and Places to Find Deer
Deer are crepuscular, meaning they are most active at dawn and dusk. Plan to be in position at least 30 minutes before sunrise. Arrive quietly, set up, and wait. Movement in your area before deer arrive will put them on alert even if they do not see you.
Field edges where forest meets open ground are prime spots. Deer like to feed in the open but want cover nearby for escape. A forest road, trail junction, or river crossing that shows heavy hoof traffic is a reliable spot to revisit.
During the autumn rut (typically October through December in North America), bucks are especially active during daylight hours as they search for does. This is the best time of year for dramatic deer portraits with antlers. Be patient and stay quiet.
Frequently Asked Questions
What focal length is best for deer photography?
A 300mm to 400mm lens gives you enough reach to stay at a respectful distance without startling the deer. A 70-200mm f/2.8 can work in meadows where deer are more relaxed, but you will often find yourself wishing for more reach in forested areas. A 100-400mm or 150-600mm zoom gives you flexibility.
How close can you safely get to a deer?
Most wildlife photographers aim to keep at least 50 to 100 yards between themselves and deer. This is for both safety and ethics. A deer that is watching you nervously is stressed. If a deer is alert with its tail raised or making a snorting sound, you are too close. Back away slowly.
Should I use flash for deer photography?
Avoid flash when photographing deer. The burst of light will startle them and ruin the encounter. Work with natural light. Golden hour light from a low angle is ideal. It wraps around the deer’s body, picks up texture in their coat, and gives a warm, natural look.
How do I get a deer to look at the camera?
A soft vocalization like a quiet whistle or a kissing sound can cause a deer to look up and face you briefly. Make the sound, be ready to shoot, and stop once you have the shot. Do not overdo it or you will cause the deer to leave.
What if the deer runs away immediately?
Stay in the same area. Deer often circle back after a few minutes if they were not badly spooked. Sit down, stay still, and wait quietly. If the deer ran due to your scent, they will not return for a while. Move upwind and find a new position.
Recommended Gear for Deer Photography
A long telephoto lens is the single biggest upgrade you can make for deer photography. Our guide to the best cameras for wildlife photography covers bodies with fast autofocus and good high-ISO performance, which matter a lot in low morning light. For learning how to enhance your shots in post, our guide to editing wildlife photos in Lightroom walks you through the workflow step by step. And if you are also interested in photographing larger species like elk or moose, check out our bear and large mammal photography guide for safety tips and gear recommendations.
Browse more nature photography tutorials, gear reviews, and field tips.
Download our guide: exposure, ISO, and aperture strategies for every light condition and terrain.
We respect your inbox. One guide, occasional tips, unsubscribe anytime.
Related Guides
 How to Photograph the Milky Way: Settings, Planning & Post-Processing
 Mastering Long Exposure Photography: A Complete Guide to Silky Water & Dramatic Skies
 How to Photograph Birds in Flight: Settings, Autofocus & Fieldcraft
 Best Digiscoping Adapters for Wildlife Photography (2026): 6 Picks for Extreme Reach on a Budget