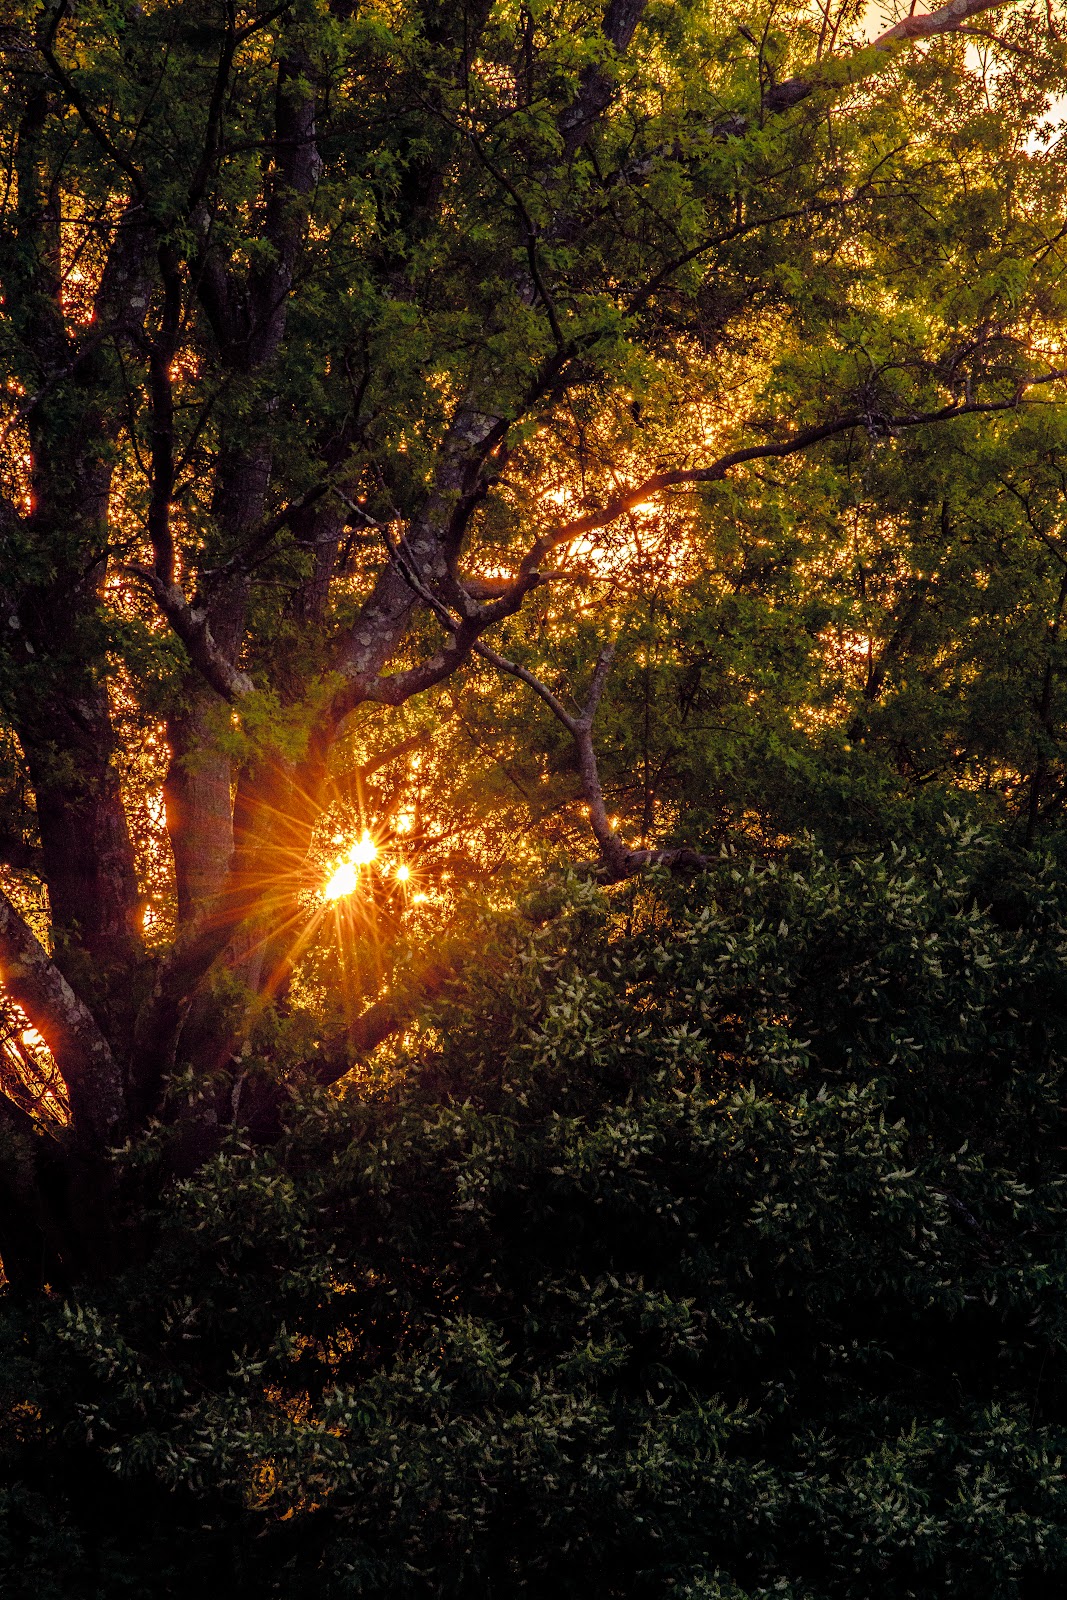
Golden hour – the 45-60 minutes after sunrise and before sunset – is when nature photographers earn their best images. The low angle of the sun produces warm, directional light that makes landscapes glow, gives wildlife a rim-lit quality that separates them from backgrounds, and turns ordinary scenes into extraordinary ones. But maximizing golden hour requires the right gear, preparation, and understanding of how the light behaves at different times and locations. This guide covers everything you need for golden hour photography in 2026.
Why Golden Hour Light Is Different
At golden hour, sunlight travels through significantly more atmosphere than at midday – filtering out the harsh blue spectrum and leaving warm red and orange wavelengths. The low angle creates:
- Long shadows that add texture to surfaces – sand, grass, rock faces, and water all reveal texture invisible at noon
- Rim lighting on subjects facing away from the sun – the luminous edge separation on a deer, a tree line, or a mountain ridge
- Side lighting that sculpts three-dimensional forms dramatically
- Warm color temperatures (2,000–3,500K) that are inherently flattering to natural subjects
Morning vs Evening Golden Hour: Which Is Better?
Both are beautiful, but they have different qualities:
- Morning (sunrise): Calmer wind, less foot traffic, mist and fog more likely, dew on vegetation, better wildlife activity (especially birds). The light tends to be slightly cooler and cleaner than evening.
- Evening (sunset): Warmer and often more dramatic color, atmospheric haze builds up over the day producing rich oranges, wildfire smoke or pollution can produce extraordinary colors, but wind tends to be stronger and wildlife is often less active.
Most serious landscape and wildlife photographers prefer sunrise for these reasons. The image quality advantage is real.
Best Camera Settings for Golden Hour
Exposure
Golden hour light changes rapidly – from cold blue just before sunrise to warm orange at the horizon to harsh direct sun 20 minutes after. Dial in exposure adjustments continuously. Common settings:
- Landscape on tripod: f/8–f/11, ISO 100, shutter speed from several seconds (pre-dawn) to 1/250s (direct sun on horizon)
- Wildlife hand-held: Wide open aperture (f/4–f/5.6), minimum shutter speed 1/500s for stationary animals, Auto ISO allowing up to 6400
- Exposing for golden light: Underexpose 2/3 to 1 stop from metered exposure to preserve the warm tones without blowing highlights
White Balance
Use Auto White Balance if shooting RAW – adjust in post. If shooting JPEG, set a manual white balance of 5500–6000K to preserve the warm golden tones without the camera neutralizing them. The camera’s Daylight or Cloudy presets often render golden hour beautifully; AWB sometimes overcorrects the warmth away.
Essential Golden Hour Gear
Camera Body
Any modern mirrorless body handles golden hour well. For maximum dynamic range to balance foreground shadow and blown-highlight sky:
- Nikon Z8 – Best dynamic range for recovering shadow detail in golden hour landscapes
- Sony A7R V – 61MP for large print crops from golden hour scenes
Wide-Angle to Standard Zoom: 16–35mm or 24–70mm
For classic landscape golden hour, a wide lens captures the sweep of warm light across an entire scene. The Sony FE 16–35mm f/2.8 GM II handles everything from pre-dawn low-light to the direct sun of sunrise itself. For those who prefer a slightly tighter field of view, a Sony FE 24–105mm f/4 G OSS is versatile across golden hour landscape and wildlife.
Telephoto for Wildlife in Golden Light
Wildlife in golden hour is a completely different experience from midday – the quality of light separates even average shots. A fast telephoto is essential:
- Sony FE 200–600mm G OSS – Best superzoom for golden hour wildlife
- Sigma 150–600mm f/5–6.3 Sports DN – Excellent value alternative
Tripod: Essential for Pre-Sunrise and Post-Sunset Work
The 15–30 minutes before and after the sun is at the horizon often produces the most dramatic color – and requires the lowest shutter speeds. A tripod is essential for this window. The Gitzo Systematic GT2543LS is the reference standard for landscape tripods. The Benro TMA38CL Mach3 is an excellent mid-range carbon fiber option.
Graduated ND Filter: Balance Sky and Foreground
When the sun is directly on the horizon, the sky is often 3–5 stops brighter than the foreground. A soft-edge graduated ND filter (3-stop, 0.9) brings the sky into balance with the land without the digital blending required by an unfiltered shot. The Lee Filters Soft GND 0.9 is the professional standard.
Planning Golden Hour Photography
Preparation is everything. Arriving at a location for the first time 10 minutes before sunrise, in the dark, with no knowledge of the compositions available, rarely produces great results. Do your prep work:
- PhotoPills or The Photographer’s Ephemeris: Both apps show exact sun position, golden hour timing, and light direction for any location on any date – essential for finding compositions where the golden light falls exactly where you want it
- Google Maps satellite: Scout compositions from above before arriving on foot
- Scout the location in advance: Walk it at non-golden-hour time to find foreground elements, leading lines, and safe footing in the dark
Composition Techniques Specific to Golden Hour
Golden hour light changes faster than most photographers expect – you typically have 15 to 30 minutes of ideal light, not the full hour the name implies. Knowing your compositions before the light arrives is the single biggest determinant of success. Scout the location the day before at the same time, or arrive 30 to 45 minutes early to walk the scene and pre-visualize where the light will fall.
The warm directionality of golden hour light creates long shadows that function as natural leading lines. A pathway, fence line, riverbank, or ridgeline running diagonally toward your subject becomes far more visually dynamic in raking side light than it would be at midday. Position yourself so the shadow direction reinforces the depth in your frame rather than cutting across it horizontally.
Silhouettes become available during the last 10 to 15 minutes before sunset and the first 10 minutes after sunrise, when the sky is still bright but the foreground falls below proper exposure at any setting that retains sky color. Expose for the brightest part of the sky, let the foreground go dark, and use strong, recognizable shapes – lone trees, birds on a branch, a heron at water’s edge – to create clean silhouette subjects. Simple outlines work best; overlapping branches or complex foliage read as a muddy mass.
Reflected golden hour light off still water – a lake, pond, or slow river – effectively doubles the warm light in your frame and creates a symmetrical composition opportunity. Get low enough that the water occupies the lower third of the frame and reflects the sky clearly. Even a slight breeze that ripples the surface creates painterly abstractions that can be more interesting than a perfect mirror reflection.
Wildlife at golden hour presents a specific challenge: subjects in open fields are lit beautifully, but subjects in partial shade – a deer at a forest edge, a bird in dappled tree cover – show extreme contrast that is difficult to render cleanly. When photographing at edges, position yourself so the subject is either fully in sunlight or fully in shade. The transition zone between the two is usually the hardest to expose and process cleanly.
Post-Processing Golden Hour RAW Files
Golden hour RAW files are simultaneously some of the most rewarding and most challenging images to process. The warm orange and red tones that make golden hour so beautiful can look garish if pushed too far in editing, and the extreme dynamic range between bright sky and deep shadow demands careful tonal management.
Start with white balance. Golden hour light is genuinely warm – typically in the 4,000 to 5,500 Kelvin range – and your camera’s auto white balance will attempt to correct it toward neutral, stripping away the color that makes the image valuable. In Lightroom or Capture One, either shoot with a fixed white balance preset (Daylight or Shade) or recover the warm tone manually by pulling the Temperature slider right until the golden tones read as they did in person. There is no single correct white balance for golden hour images – the goal is to match the emotional quality of the scene as you experienced it.
Graduated filters and luminance masks are essential tools for managing sky-to-ground exposure. Apply a graduated filter darkening the sky by one to two stops while lifting the shadows in the foreground separately. This mimics the graduated ND filter you should have used in camera and produces a natural tonal balance. In complex scenes with irregular horizon lines – trees, buildings, rocky ridges – a luminance mask or AI-masking tool (available in Lightroom 2024 and later) produces far cleaner results than a linear graduated filter.
Highlight recovery in the sky is usually more achievable with golden hour images than midday shots because the sky values, while bright, are often not clipped to pure white. Pull highlights down aggressively first, then assess whether the cloud texture or color gradation has recovered adequately before applying other adjustments. If the highlight channel is truly blown, no amount of recovery will restore detail – which is why exposing for the sky in camera is always preferable to trying to recover it in post.
Noise in the shadowed foreground is a common problem at golden hour because the foreground is underexposed by design. Modern sensors in cameras like the Sony A7R V, Nikon Z8, and Canon R5 Mark II have exceptional shadow recovery capability, but all show some luminance noise when shadows are lifted more than three stops. Apply luminance noise reduction selectively to the foreground using a mask rather than globally across the entire image, which would soften the sharpness in well-exposed areas of the frame.
Frequently Asked Questions
How long does golden hour actually last?
Golden hour typically lasts 45–60 minutes around sunrise and sunset at mid-latitudes. Near the summer solstice at higher latitudes (Scandinavia, Alaska, northern Canada) golden hour can extend to several hours or never fully end. Near the equator it’s compressed to 20–30 minutes. Use a photography app like PhotoPills to see exact golden hour timing for your location and date.
Can I shoot good golden hour photos on a cloudy day?
Broken clouds at golden hour often produce more dramatic color than a clear sky – the light reflects off cloud undersides in vivid oranges and pinks. However, a completely overcast sky blocks the directional golden light. The best scenario is an overcast sky that breaks open near the horizon at sunrise or sunset.
What is the difference between golden hour and blue hour?
Blue hour occurs roughly 20–40 minutes before sunrise and after sunset, when the sun is just below the horizon and the sky glows in cool blues and purples. Golden hour follows sunrise (warm orange/yellow light) or precedes sunset. Both are excellent for landscape photography – blue hour offers beautiful, even-toned light with no harsh shadows.
Browse more nature photography tutorials, gear reviews, and field tips.
Download our guide: exposure, ISO, and aperture strategies for every light condition and terrain.
We respect your inbox. One guide, occasional tips, unsubscribe anytime.
Related Guides
 Best Polarizing Filters for Nature Photography (2026): 6 CPL Filters Compared
 How to Photograph the Milky Way: Settings, Planning & Post-Processing
 Mastering Long Exposure Photography: A Complete Guide to Silky Water & Dramatic Skies