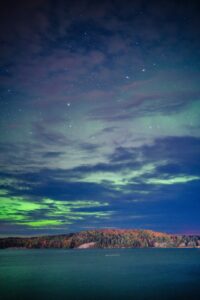
A typical Milky Way core exposure runs somewhere near ISO 6400, f/1.8, 20 seconds. At those settings a capable full-frame sensor will resolve the core’s dust lanes cleanly, while the dark foreground picks up a thin layer of noise that has to be dealt with in post. Getting there takes planning: core alignment is predictable months ahead with an app like PhotoPills, but clear skies are not, and weather cancellations are part of the process.
That gap is the whole argument for camera choice in astrophotography: sensor performance at high ISO is not an abstraction. It is the difference between a Milky Way image that holds up printed at 24×36 and one that falls apart at 100%. This guide covers which full-frame cameras actually deliver for night and astrophotography work in 2026, based on real field use in dark-sky locations.
What Milky Way Photography Actually Demands From a Camera
Night photography is the harshest test of sensor performance. You’re pushing ISO to 3200–12800, shooting at the widest aperture your lens allows, and asking your sensor to render pinpoint stars against near-black sky with minimal noise. The metrics that matter for landscape photography – dynamic range at base ISO, color accuracy – still matter here, but a new metric dominates: high-ISO noise performance.
The NPF rule for exposure time: More accurate than the old 500 rule, the NPF rule calculates maximum exposure time based on pixel pitch, aperture, and focal length. For a 61MP full-frame sensor at 20mm f/2.8: approximately 8–10 seconds before trailing is visible at 100%. For a 12MP sensor at 14mm f/1.8: 20+ seconds. Higher resolution sensors require shorter exposures to avoid trailing – an important consideration when choosing between a low-MP dedicated astro body and a high-MP landscape body.
Full-frame is not negotiable for serious Milky Way work. Larger photosites on full-frame sensors collect more light per unit time, which translates directly to better signal-to-noise ratio at high ISO. The gap between full-frame and APS-C at ISO 6400 is roughly 1–1.5 stops of effective noise performance. At 2am in January with nothing but starlight, that 1.5 stops matters enormously.
Best Cameras for Milky Way Photography (2026)
1. Sony A7S III – Best High-ISO Performance for Night Photography
If you’re serious about astrophotography, the A7S III is the answer. Sony built this camera’s 12.1MP BSI sensor specifically for low-light and video applications, and that specific engineering decision produces the cleanest high-ISO files available in a mirrorless camera in 2026. At ISO 12800 – a setting that’s borderline unusable on most cameras – the A7S III produces files that, with competent processing, yield printable astrophotography images. At ISO 6400, the noise floor is so low it almost doesn’t register as noise – it looks like film grain, not digital noise, which is a meaningful distinction for print quality.
The 12MP resolution is the deliberate tradeoff. For displaying on screens, sharing online, or printing at 20×30, 12MP is entirely sufficient. For printing at 40×60 – the gallery-wall size where astrophotography images are stunning – 12MP starts to show its ceiling if you’re cropping. The A7S III is the camera for photographers who prioritize noise performance absolutely, accepting lower resolution as the cost.
In the field, the A7S III’s 5-axis IBIS is useful for the foreground anchor shots you’ll blend into sky composites. The battery lasts well in cold weather – a serious practical consideration for winter astrophotography sessions that run 4–6 hours.
2. Sony A7R V (61MP) – Best for Combined Landscape and Milky Way Work
If you shoot landscape photography during the day and Milky Way at night – which describes most nature photographers who travel to dark-sky locations – the A7R V is a more practical choice than the A7S III. 61MP at ISO 3200–6400 produces files with manageable noise and extraordinary resolution. You capture the Milky Way core at ISO 6400 with your 14mm lens, then shoot the foreground landscape at base ISO during blue hour, blend in post, and you have a composite with both sky and land at their optimal quality.
The A7R V’s high-ISO performance is not as clean as the A7S III’s – there’s a noticeable noise difference at ISO 12800. But at ISO 3200–6400, the performance gap narrows considerably. For photographers who want one body for everything – landscape, wildlife, astrophotography – the A7R V is the right answer.
3. Nikon Z8 (45MP) – Best Nikon for Milky Way Photography
Nikon’s Z8 sensor produces excellent high-ISO files – not A7S III territory, but genuinely competitive with the A7R V and clearly ahead of the Canon R5 Mark II at ISO 6400 and above. The Z8’s strength for night work is the tonal rendering of the sky: Nikon’s processing pipeline preserves the subtle color gradations in the Milky Way – the warm core tones, the blue-green wisps of nebulae – in a way that feels more natural and requires less aggressive editing than Canon’s rendering.
Practically: the Z8 uses an LCD that tilts in both directions, which is invaluable for aiming at the sky from ground level. Its physical control layout keeps you productive in the dark without needing to illuminate your screen to find settings. In subzero temperatures at 2am, camera handling is not a trivial consideration.
4. Canon EOS R5 Mark II (45MP) – Best Canon for Night Photography
The R5 Mark II is a capable Milky Way camera with a specific strength: Canon’s color science produces warm, detailed Milky Way core rendering that many photographers prefer straight out of camera. The sky-blue tones and warm orange core look natural without aggressive editing.
The honest comparison: at ISO 6400, the R5 Mark II produces more noise than the Sony A7R V or Nikon Z8 at equivalent settings. It’s manageable and the files process well, but it’s real. For photographers already in the Canon ecosystem who don’t want to add a second body for night work, the R5 Mark II is a legitimate single-body solution – just expect to work slightly harder in post on the noise.
5. Sony A7 IV (33MP) – Best Value Full-Frame for Milky Way
The A7 IV is the accessible entry point for full-frame astrophotography. At ISO 3200–6400, its 33MP BSI sensor performs close to the A7R V – the per-pixel noise is comparable, though the lower resolution means less latitude for cropping and large-format printing. For photographers on a budget who want to shoot the Milky Way seriously, the A7 IV represents genuine value in the full-frame landscape.
Field note: the A7 IV’s battery performance in cold conditions is adequate but not exceptional. Bring two batteries for a full night session. Below 20°F, battery capacity drops noticeably – keep a spare in an inner jacket pocket.
Essential Lenses for Milky Way Photography
The lens matters as much as the body for astrophotography. You need fast glass – f/2.8 minimum, f/1.8 or f/2 strongly preferred. For Sony, the Sony FE 14mm f/1.8 GM is the outstanding choice: ultra-wide for landscape context, f/1.8 for maximum light gathering, and optically excellent – stars render as points, not the coma-smeared blobs that plague cheaper ultra-wide lenses. The Sony FE 16–35mm f/2.8 GM II is the versatile option: slightly less light-gathering than f/1.8, but the zoom flexibility lets you compose tighter Milky Way core crops or wider environmental shots.
Camera Settings for Milky Way Photography
ISO recommendations by camera:
- Sony A7S III: ISO 12800 is usable. Push to ISO 25600 in critical situations.
- Sony A7R V / Nikon Z8: ISO 6400 as primary, ISO 3200 for foregrounds if light allows.
- Canon R5 Mark II: ISO 3200–6400. Above 6400, noise becomes more aggressive to manage.
- Sony A7 IV: ISO 3200–6400. Similar practical ceiling to the R5 II.
Focus for stars: Manual focus to infinity, but not all lenses’ infinity mark is accurate. In daylight, focus on a distant subject at infinity, note the exact position of your focus ring, and mark it with tape. In the field, use that tape mark and confirm with live view zoomed to a bright star. Getting this right is the single most impactful technical skill for astrophotography.
Noise reduction through stacking: Shoot multiple exposures and stack them in Sequator (free, excellent) or Lightroom’s Denoise AI. Stacking 4–8 frames dramatically reduces noise – the equivalent of shooting at 1–1.5 stops lower ISO. On a stable tripod in still air, stacking is the highest-leverage technique for improving Milky Way image quality regardless of camera body.
Dark Sky Locations in the Upper Midwest
Finding dark sky is as important as any camera choice. Bortle 1–3 skies – where the Milky Way core casts a visible shadow – are rare near population centers. In Michigan, the Keweenaw Peninsula (Copper Harbor area, Bortle 2–3), the western Upper Peninsula near Iron County, and Wilderness State Park near the Straits of Mackinac are excellent dark-sky options. Check Light Pollution Map (lightpollutionmap.info) before any trip – a two-hour drive to darker skies produces dramatically better astrophotography than the best camera can compensate for in light-polluted suburban locations.
Frequently Asked Questions
Do I need a full-frame camera for Milky Way photography?
Yes, for serious results. APS-C cameras at ISO 6400 show substantially more noise than full-frame alternatives at equivalent settings. The Sony A6700 is the best APS-C option and produces good astrophotography in excellent dark-sky conditions, but a used Sony A7 III or A7 IV at similar money will produce cleaner results. If your budget constrains you to APS-C, focus your effort on getting to darker skies rather than upgrading gear – location matters more than sensor size at the extremes.
Is a star tracker worth it for Milky Way photography?
Yes, if you plan to shoot astrophotography regularly. A star tracker (iOptron SkyGuider Pro, Sky-Watcher Star Adventurer Mini) allows longer exposures by compensating for Earth’s rotation – turning a 10-second maximum into a 3-minute exposure. Longer exposures mean lower ISO, which means dramatically less noise. The tradeoff: the foreground blurs during tracking, so you need a separate foreground exposure taken without tracking and blended in post. This two-shot composite approach is how professional astrophotography images are made.
What is the best focal length for Milky Way photography?
14–20mm on full-frame is the sweet spot. Wider gives you more context and longer possible exposure time; narrower (24mm+) isolates the Milky Way core more tightly but limits your exposure time. For a first astrophotography lens, a 20mm or 24mm f/1.8 prime gives you core isolation with excellent sharpness. The 14mm is the choice when you want maximum foreground context.
Can I use image stabilization for astrophotography?
Turn it off on a tripod. IBIS can introduce micro-vibrations that soften stars at long exposures. Most modern cameras have a tripod detection mode that helps, but the safest practice is to disable IBIS for any exposure over 5 seconds on a stable tripod. Optical image stabilization in the lens should also be turned off for tripod-mounted star shots.
Browse more nature photography tutorials, gear reviews, and field tips.
Download our guide: exposure, ISO, and aperture strategies for every light condition and terrain.
We respect your inbox. One guide, occasional tips, unsubscribe anytime.